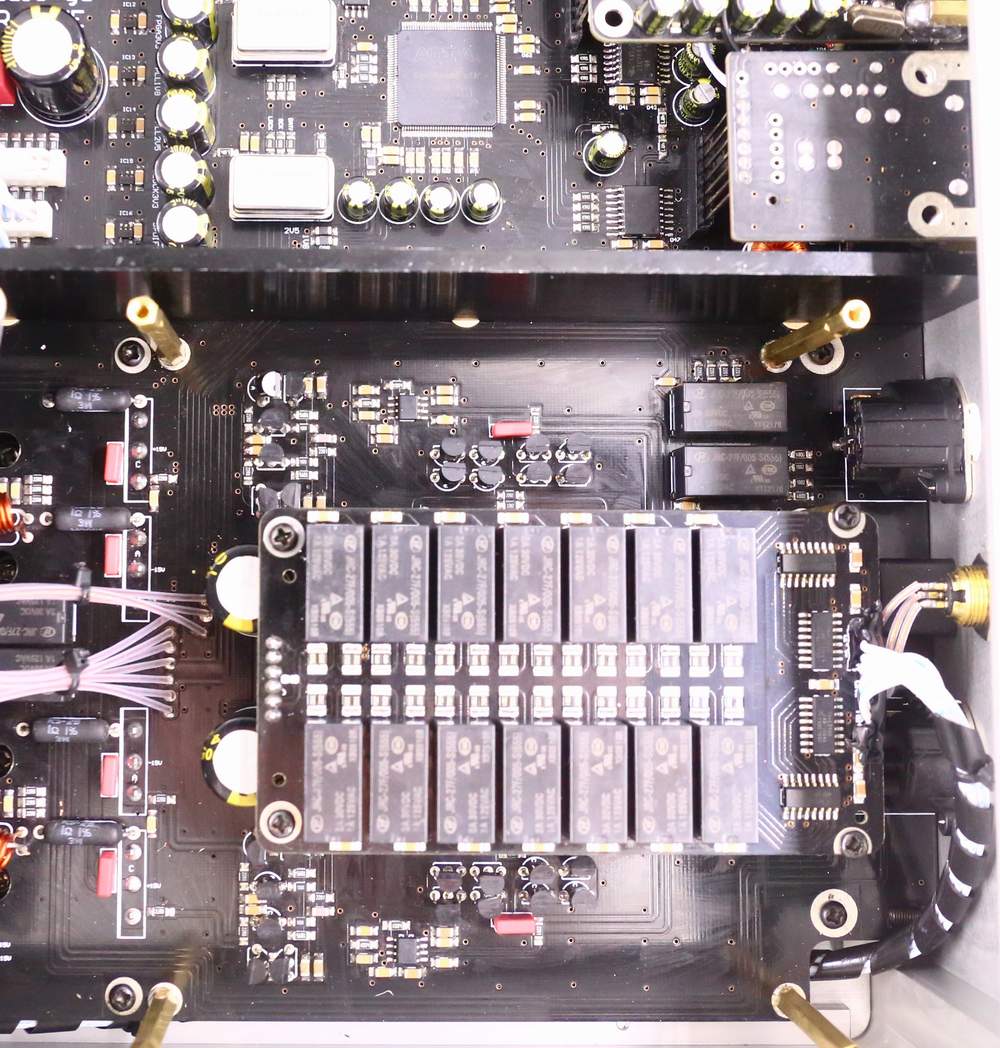
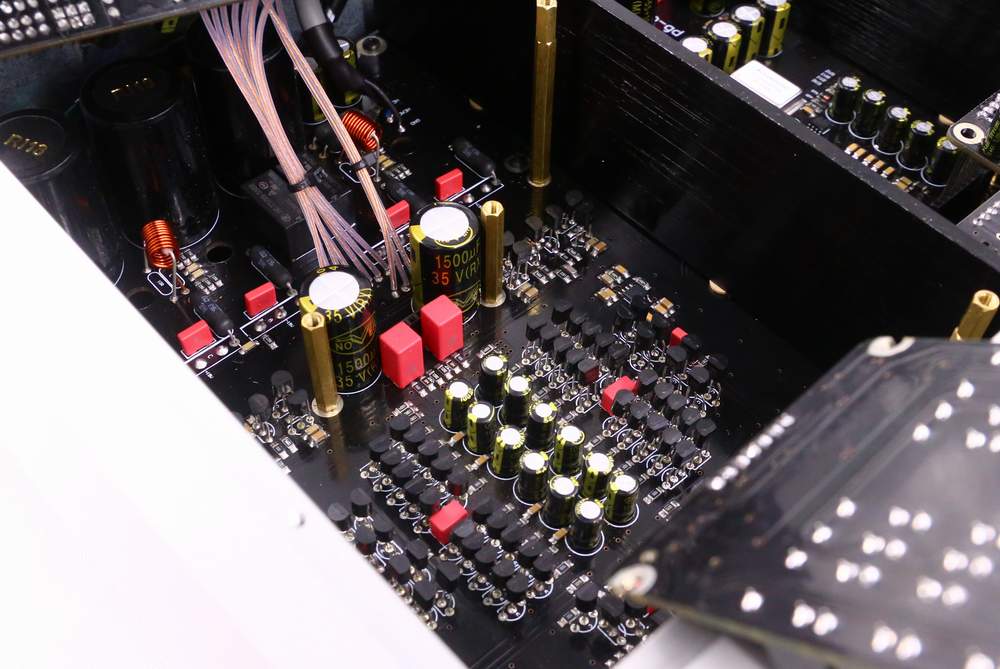
|
Please note:
This product applies the latest power technology.
Therefore the working temperature has dropped significantly compared
to the previous generation products. This allows leaving power on
over the long term.
This product is burned-in for at
least 300 hours before shipping.
We recommend burning it
for an additional 300 hours for best results.
The quickest way to complete the
burn-in of this product is to play music continuously.
Do not immediately power on the unit
after powering it off. Wait for at least 30 seconds.
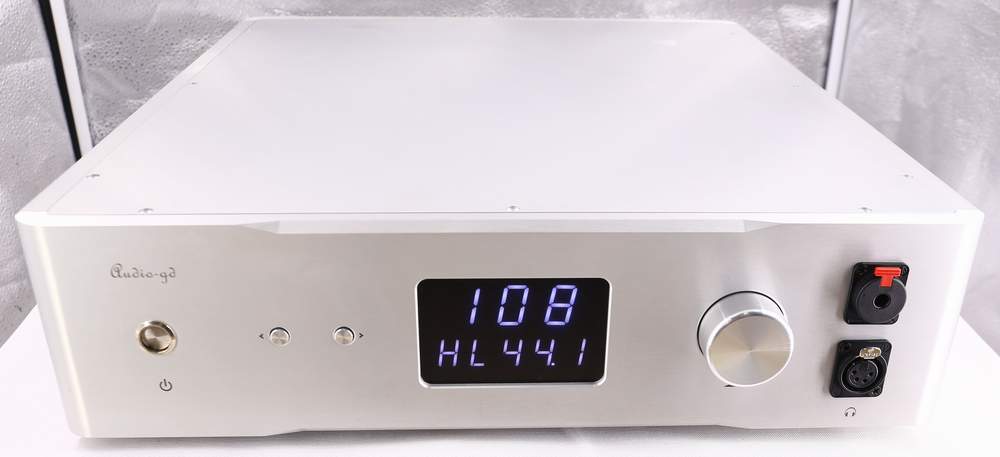
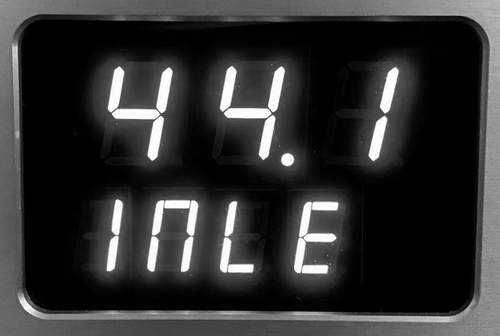
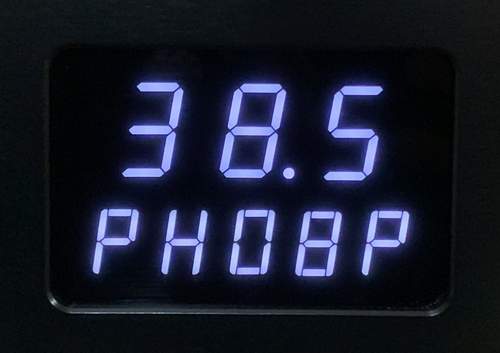
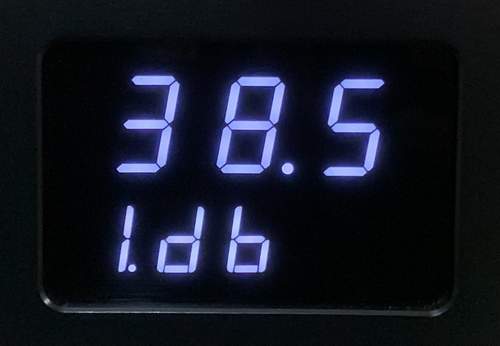
Normal working
state display:
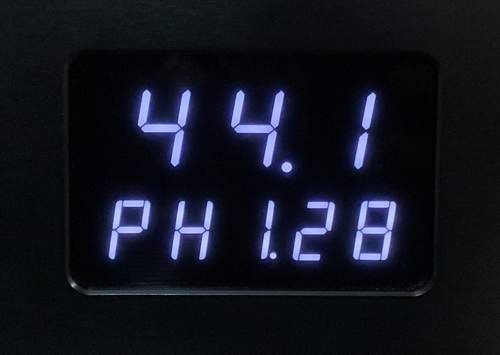
Digit on top:
Input signal
sampling rate indicator; 44.1, 48.0,88.2, 96.0, 176, 192, 352 and
384 are for the PCM formats, while 064, 128, 256 and 512 are for the DSD
formats.
Leftmost digit on bottom:
Output channel
indicator, H mean for headphone output , P mean for preamp output ,D
mean for DAC output.
2nd digit
on bottom:
Gain indicator. H
mean high gain 26DB, L mean low gain 13DB. (High gain design not
recommend connect the in-ear headphone.)
3nd digit
on bottom:
Input channel
indicator, either 1,2,3,4,5, 6 or 7 ( for details, please read below
). If update the EC firmware to allow external 10 MHz clock input,
when the clock connected, the right bottom of this digit will light
up a dot, that can go into the setting menu to set the DAC work with external
clock.( for details, read below ).
The remaining digits on bottom:
Volume control number , from 00
to 99 range.
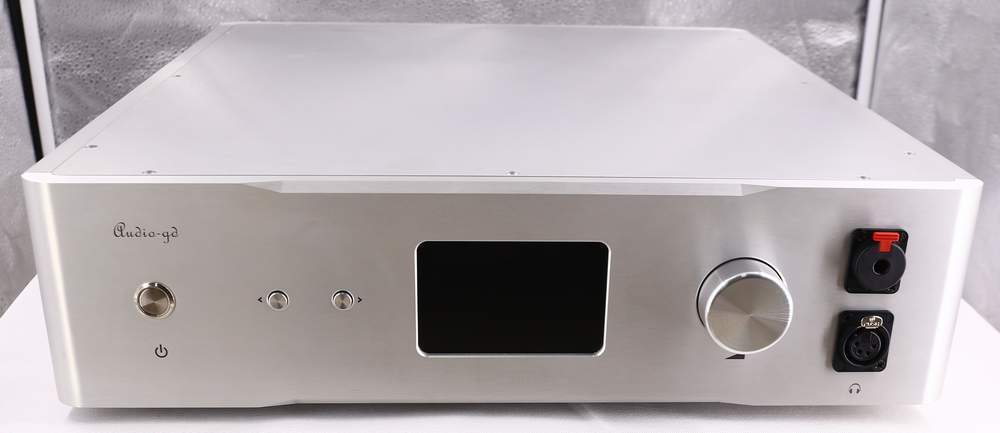
Button
functions:
Left button: (Only
available while user want to change the set feature .)
Push the left button
once, the leftmost digit of bottom will blink, which indicates it is selected.
This allows changing the corresponding setting. Push the right button to select the desired value. While the display is
still blinking, push left button again , the next digit to the right
will be selected and blink.
While the rightmost digit of
bottom is
blinking, push the left button one time, the menu will change
to page 2. While the rightmost digit of the page 2 is blinking, push
the left button one time, quite the set menu and back to the normal
state.
Right button: (Mulriple functions.)
While the display is in normal
state (not blinking), it allows selecting the input source in
decreasing order. One of the following will be displayed:
"1 - AES", for the AES/EBU digital input;
"2 - BNC", for the BNC coaxial digital input; (If update the EC firmware, the 2-BNC is for the external clock input .The
external clock output impedance must be 75 ohms, the supported
output level range is 0.7-3.0V and a 75-ohm BNC cable must be used.)
"3 - RCA", for the RCA coaxial digital input;
"4 - OPT", for the optical digital input; (For the best
sound quality , R-27HE optical input sensitivity rigorous follow the
worldwide standard, it may can't
work well with some models TV, TV box or game box optical outputs
if weaker than standard.)
"5 - IIS", for the HDMI-IIS digital input; (The HDMI-IIS
need the source HDMI-IIS output has the same pin definitions for
compatible and work. It can't work with the TV or computer standard
HDMI output .)
"6 - USB", for the USB digital input. (For Windows , the
computer must install the driver for recognize the device. Mac,
Linux, IOS and Android don't need driver install.)
"7 - XLR", for the analog input.
While the display is blinking,
the right button for set the menu value for change the setting.
Knob:
For change the volume .
Setting values:
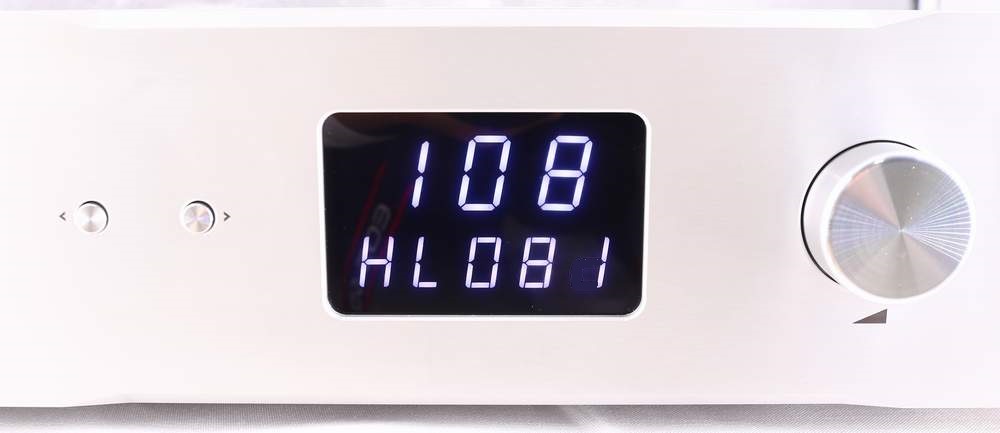
Menu Page 1:
Digit on top:
When push the
setting button,the digit on top show the product inside temperature
of celsius .
The leftmost digit on bottom: Output
channel select
H mean for headphone output ,
P mean for preamp output (with volume control),
D mean for DAC output (Fixed output level without
volume control).
The second digit from the left on
bottom: Gain select.
H mean
high gain 26DB.
L mean low gain 13DB.
The 3rd and 4th digit
on bottom:
OS and NOS mode select.
While working under
oversampling (OS) mode, the lower the oversampling level is, the
warmer the sound will be. While working under non-oversampling (NOS)
mode , the sound even more warmer and smoother. The possible values are:
N0 : New NOS mode.
N1 : Basic NOS mode.
O2 : 2X oversampling
O4 : 4X oversampling
O8 : 8X oversampling
The 5th digit
on bottom: The DAC and Preamp
output select for the rear outputs.
P : The rear output ports with volume
control .
2 : The rear output ports with 2V RMS
DAC output level (XLR).
3 : The rear output ports with 3V RMS
DAC output level (XLR).
4 : The rear output ports
with 4V RMS DAC output level (XLR).
5 : The rear output ports
with 5V RMS DAC output level (XLR).
Please note:
The RCA output
has a half output level of the XLR.
The headphone output always
with the volume control.
The input 7 XLR always has
volume control.
Menu Page 2:
The leftmost digit on bottom: External
clock select
I (Internal) : Selects the
internal clock
E (External) : Selects the external
clock
The external clock selection is only
possible after a successful clock connection is made, otherwise the
display will show "Fail" on an attempt to select it.
The 2nd digit
on bottom: Simulates the
sound of a turnable
S (Simulate) : Activate
the phono simulation feature, and we recommend to set the DAC on
OS2, NOS0 or NOS1 mode for best results.
d (Non-Simulate) :
Disable the phono simulation.
The 3rd digit
on bottom: Display
auto-dimming setting
A (Auto Dim) : Enables the display's
auto-dimming; the display will dim 10 seconds after the buttons are
left untouched, only keeping a LED bar lit to indicate the unit is
turned on. As soon as a button is touched, the display will turn
back on.
b (bright) : Disables the display's
auto-dimming, the display will remain on at all time.
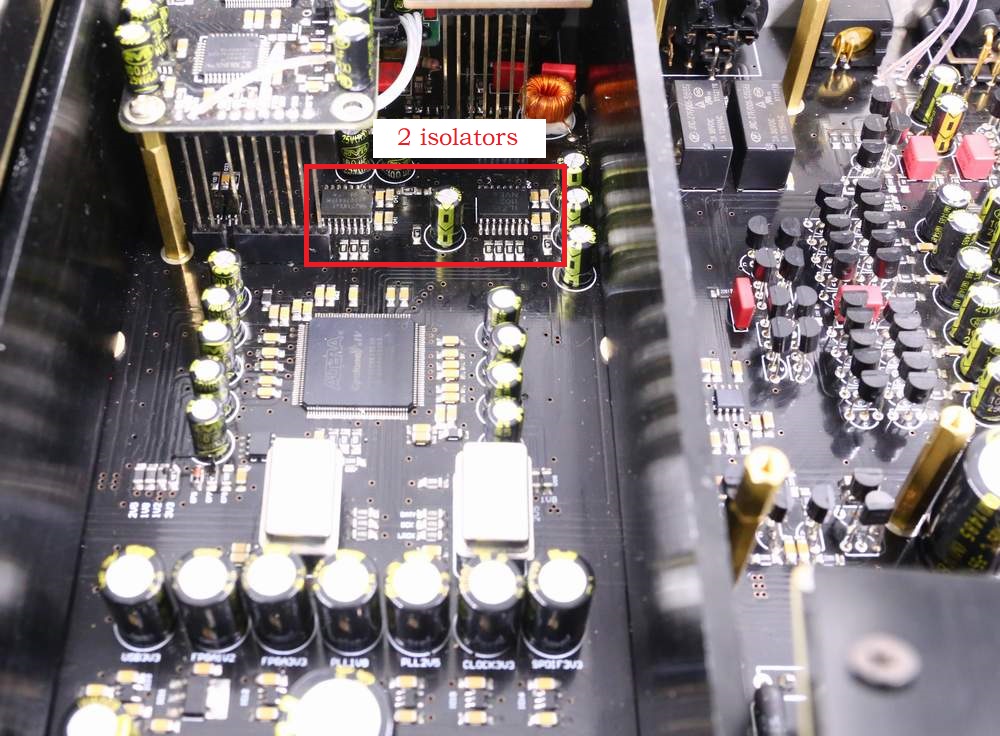
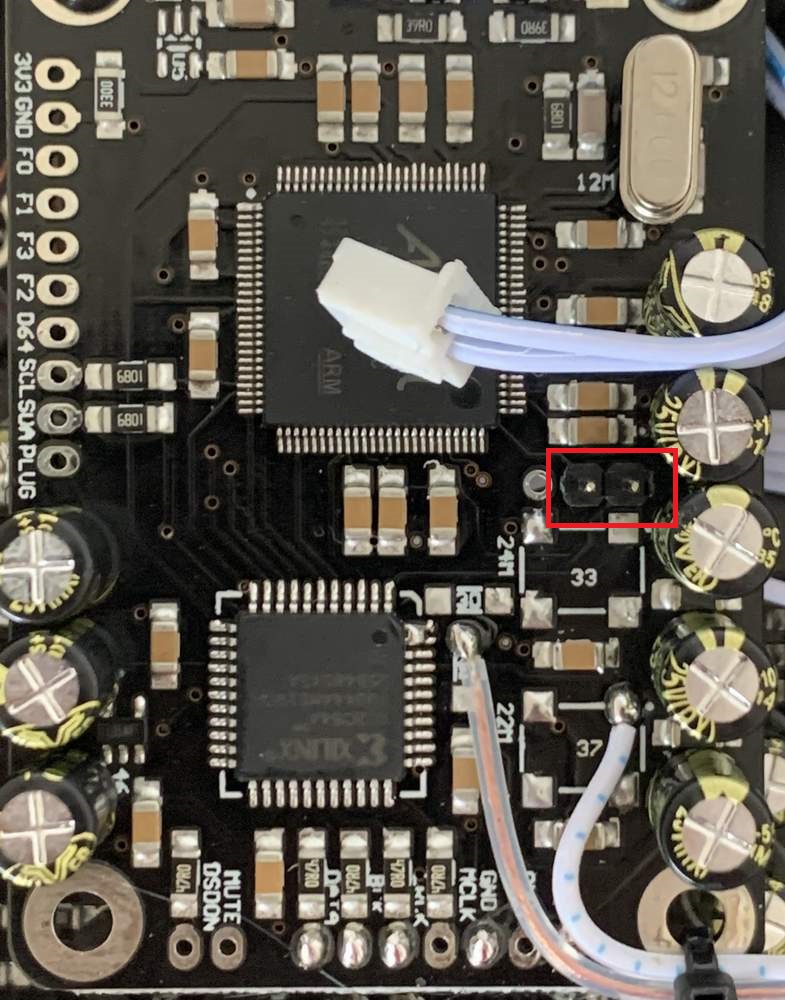
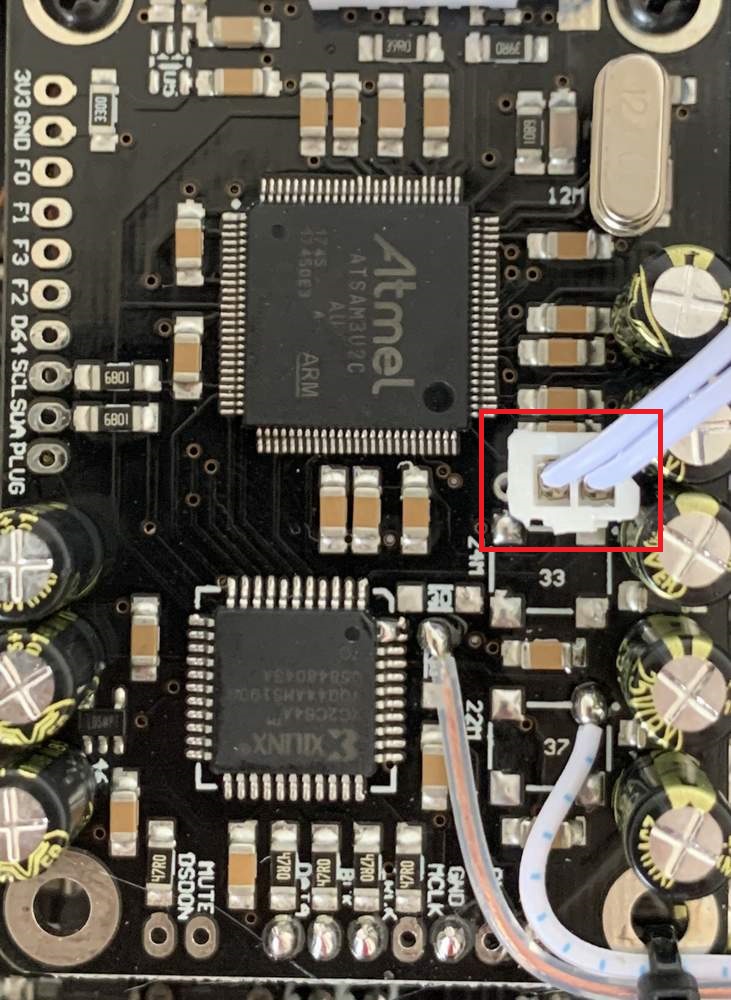
HDMI definitions : (Apply
HDMI transmit the IIS signal, the pin's definitions must exact same ,
and not promise compatible with other brands)
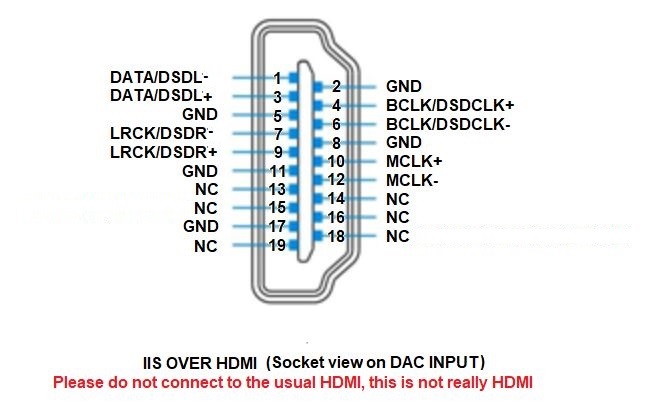
Note that this
product does not require the source MCLK signal but if present, it will
simply be discarded.
|