|
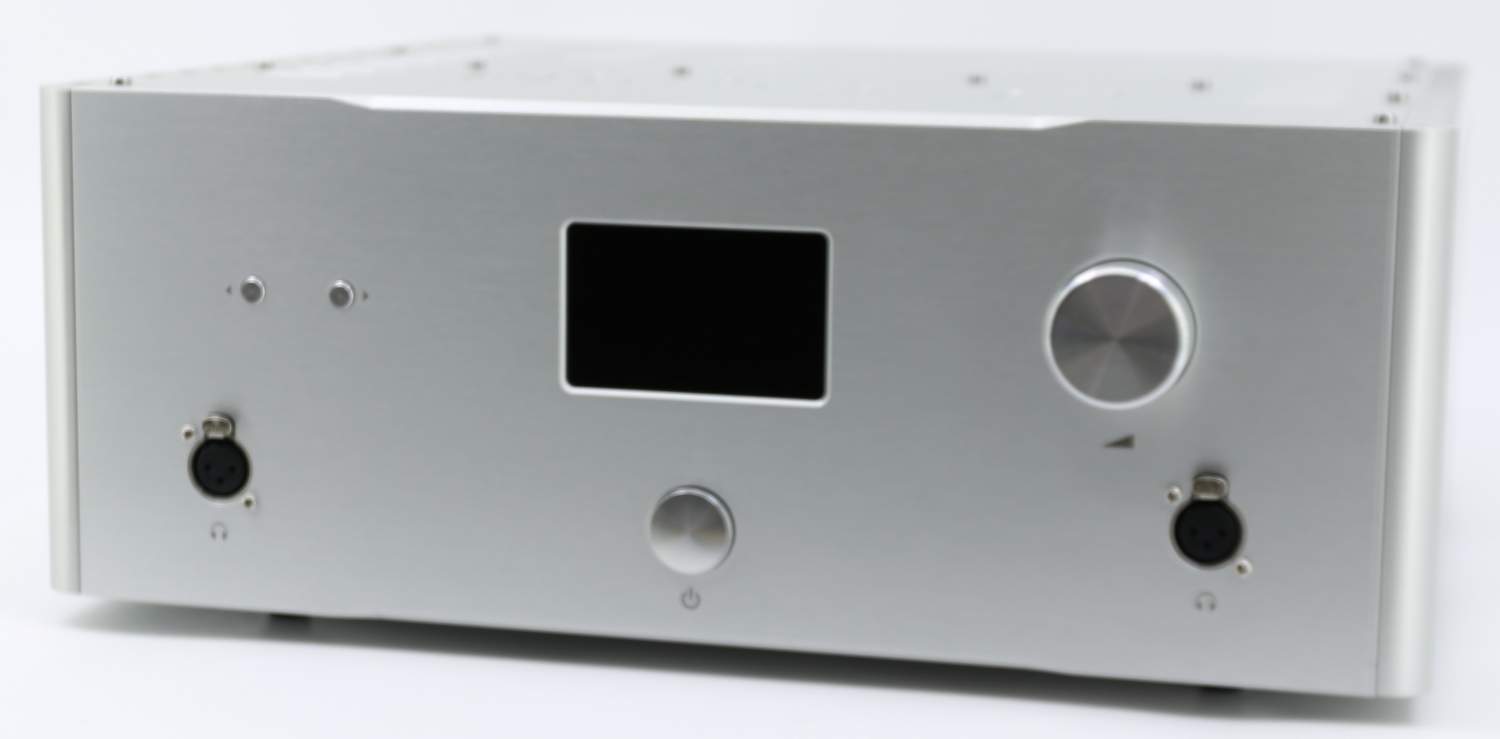
Button
and Knob
functions :
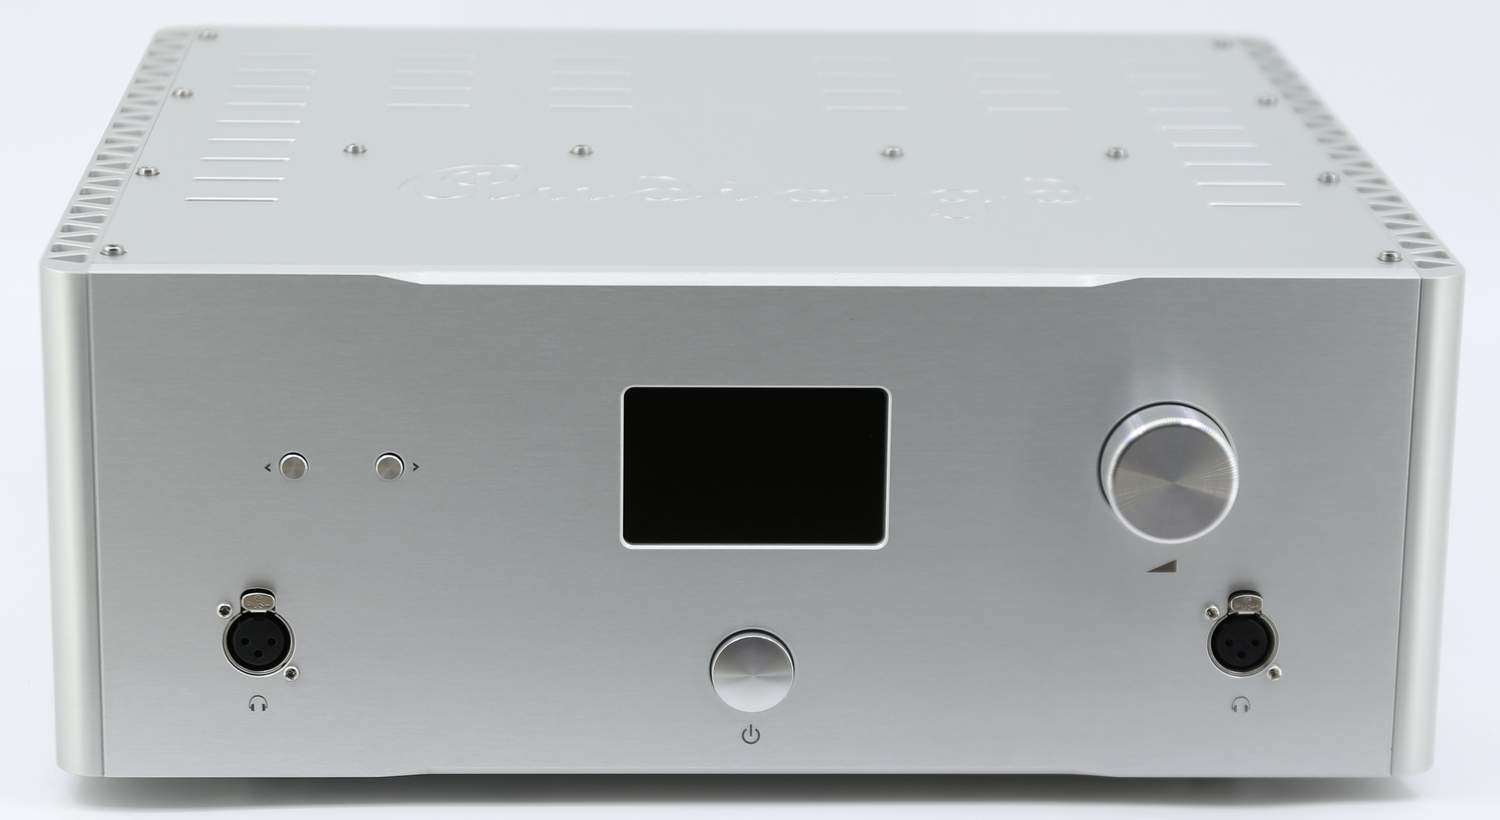
Middle button:
Power On or Off.
Left button on left side: (Only
available while user want to change the set feature .)
Push the left button
once, the leftmost digit of bottom will blink, which indicates it is selected.
This allows changing the corresponding setting. Push the right button to select the desired value. While the display is
still blinking, push left button again , the next digit to the right
will be selected and blink.
While the rightmost digit of
bottom is
blinking, push the left button one time, quite the set menu and back to the normal
state.
Right button on left side: (Mulriple functions.)
While the display is in normal
state (not blinking), it allows selecting the input source in
decreasing order. One of the following will be displayed:
"1 - XLR"
"2 - RCA"
"3 - XLR"
"4 - ACSS"
Knob on right:
Adjust the volume control .
Display inform (In normal working state):
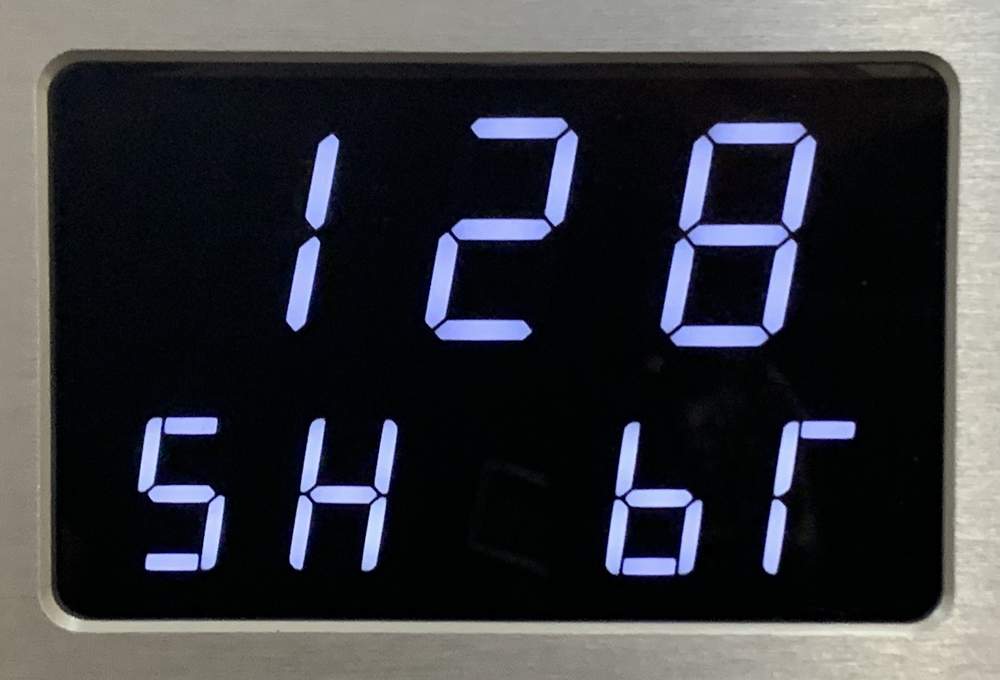
Leftmost on top
: Input channel number.
"1 - XLR"
"2 - RCA"
"3 - XLR"
"4 - ACSS"
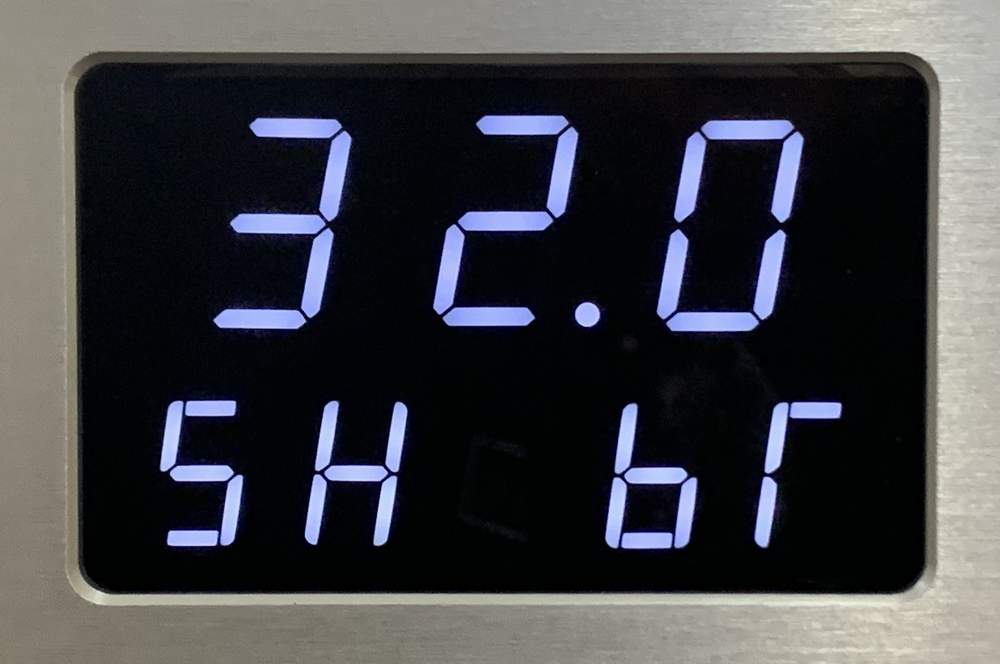
Left 2nd and 3rd on top : Mean the volume level, from 0 to 99, 99
is the max volume .
Leftmost on bottom
: Mean the output channel, "H" mean the headphone
output , "S" mean the speaker output .
Left 2nd on bottom :
: Mean the gain
select , "H' mean the High gain 34DB , "L" mean the Low gain
24DB .
Available with all inputs.
Left 3rd on bottom : Mean the
display auto-dimming setting:
d (Auto Dark) : Enables the display's auto-dimming; the display will dim
10 seconds after the buttons are left untouched, only keeping a LED bar
lit to indicate the unit is turned on. As soon as a button is touched,
the display will turn back on.
b (bright) : Disables the display's auto-dimming, the display will remain
on at all time.
Rightmost on bottom : Mean the volume with/without
memory.
r (remember) : Memory the volume level for every channels.
F (forget): Without volume memory at all, every time power on the
amp, volume default set on 0.
Display inform (When push the left
button into the setting state ):
All digits on top : Push the left
button one times, the all digits on top show the unit inside
temperature of centigrade .
Leftmost on bottom
: When it blinking , through push the right
button can change the output channel ,"H' mean select the headphone output , "S"
mean select the speaker output .
Left 2nd on bottom :
When it blinking , through push the right
button can change the gain ,"H' mean the High gain 34DB , "L" mean the
Low gain 24DB . Available with all inputs.
Left 3rd on bottom :
When it blinking, through push the right button change change the
auto-dimming setting:
d (Auto Dark) : Enables the display's auto-dimming; the display will dim
10 seconds after the buttons are left untouched, only keeping a LED bar
lit to indicate the unit is turned on. As soon as a button is touched,
the display will turn back on.
b (bright) : Disables the display's auto-dimming, the display will remain
on at all time.
Rightmost on bottom : Mean the
volume with/without memory.
r (remember) : Memory the volume level for every channels.
F (forget): Without volume memory at all, every time power on the
amp, volume default set on 0.
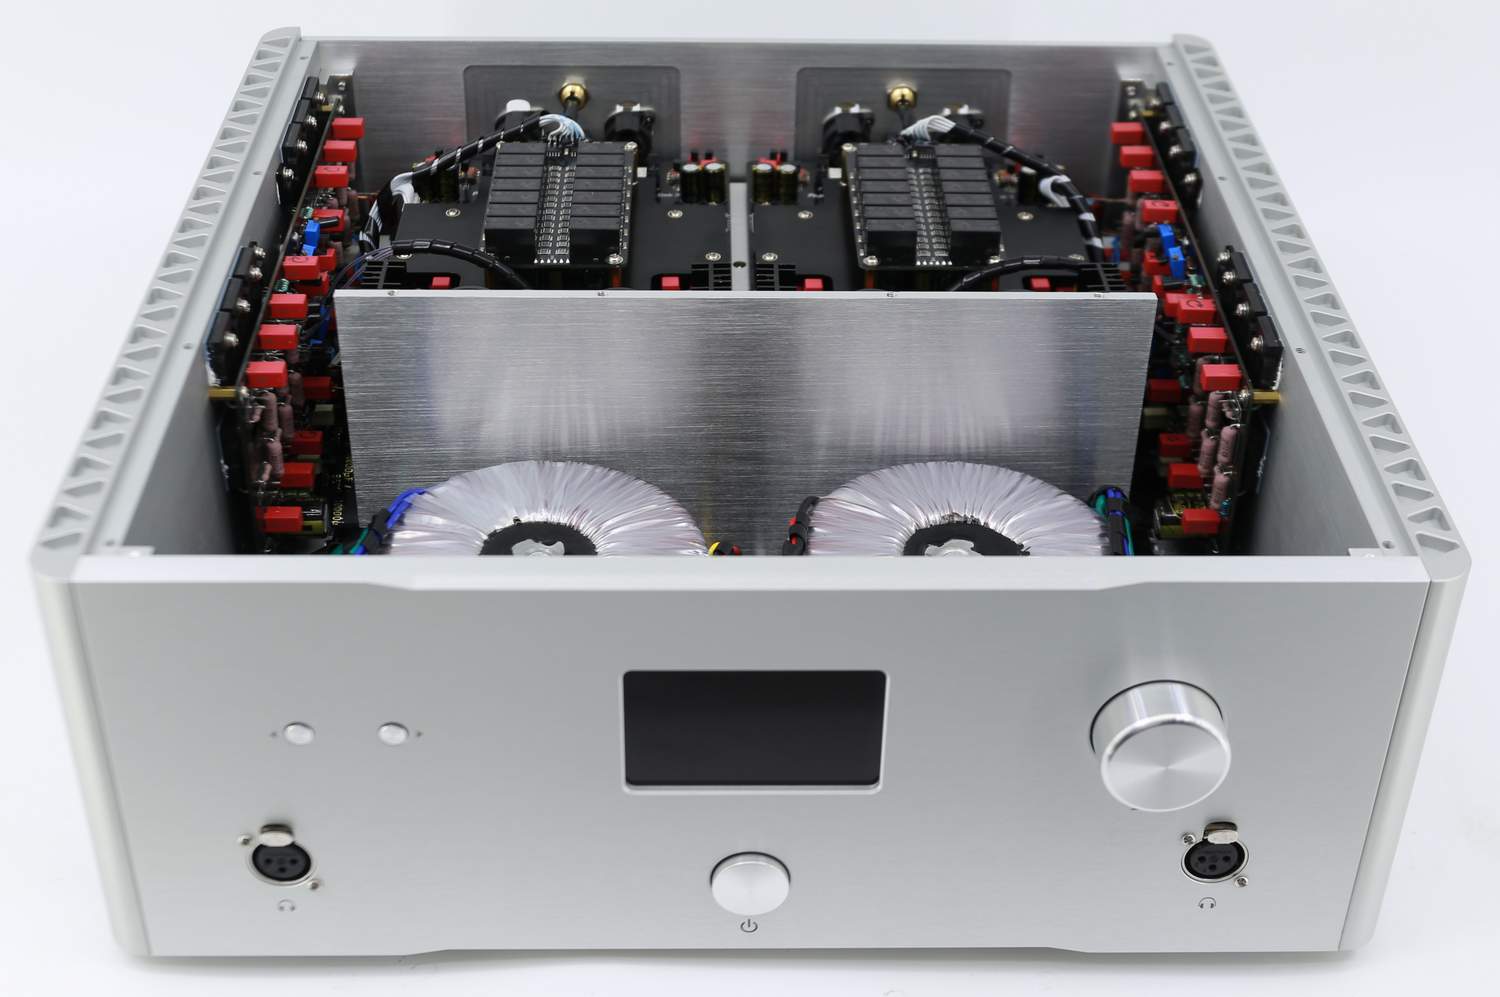
The unit applied input short design :
The
unit had design the analog idle input
short circuit for avoid the disturb between different sources.
This design also applied in a
lot high end
brand devices.
The working theory :
Without the idle input short circuit
,if
the
input 5 and input 4 had connect two extra DACs, while users select
the either input 5 and input 4 , the another input signal
will fire through the circuits and mix into the using signal, even though this
signal is weak but still can degrade on the sound
quality.
With the idle input short
circuit function : if user select either the input 5 and input 4, the
another input signal will short
circuit then no any signal fire through circuits , can keep the sound
quality had not degrade.
In world there are more than 99% DACs and the sources had allow the
outputs short ,
Below case users
don't want the idle input short
circuit function, users can open the chassis, pull off the jumpers of
the proper input channels, please note must pull off of left and right
channels together :
1, The same extra source not only connect the
unit analog input, but connect with other amps simultaneity.
2, The same extra source connect to the
unit
different inputs at simultaneity.
If you don't need the input short feature, please inform when you place
the order . |