|
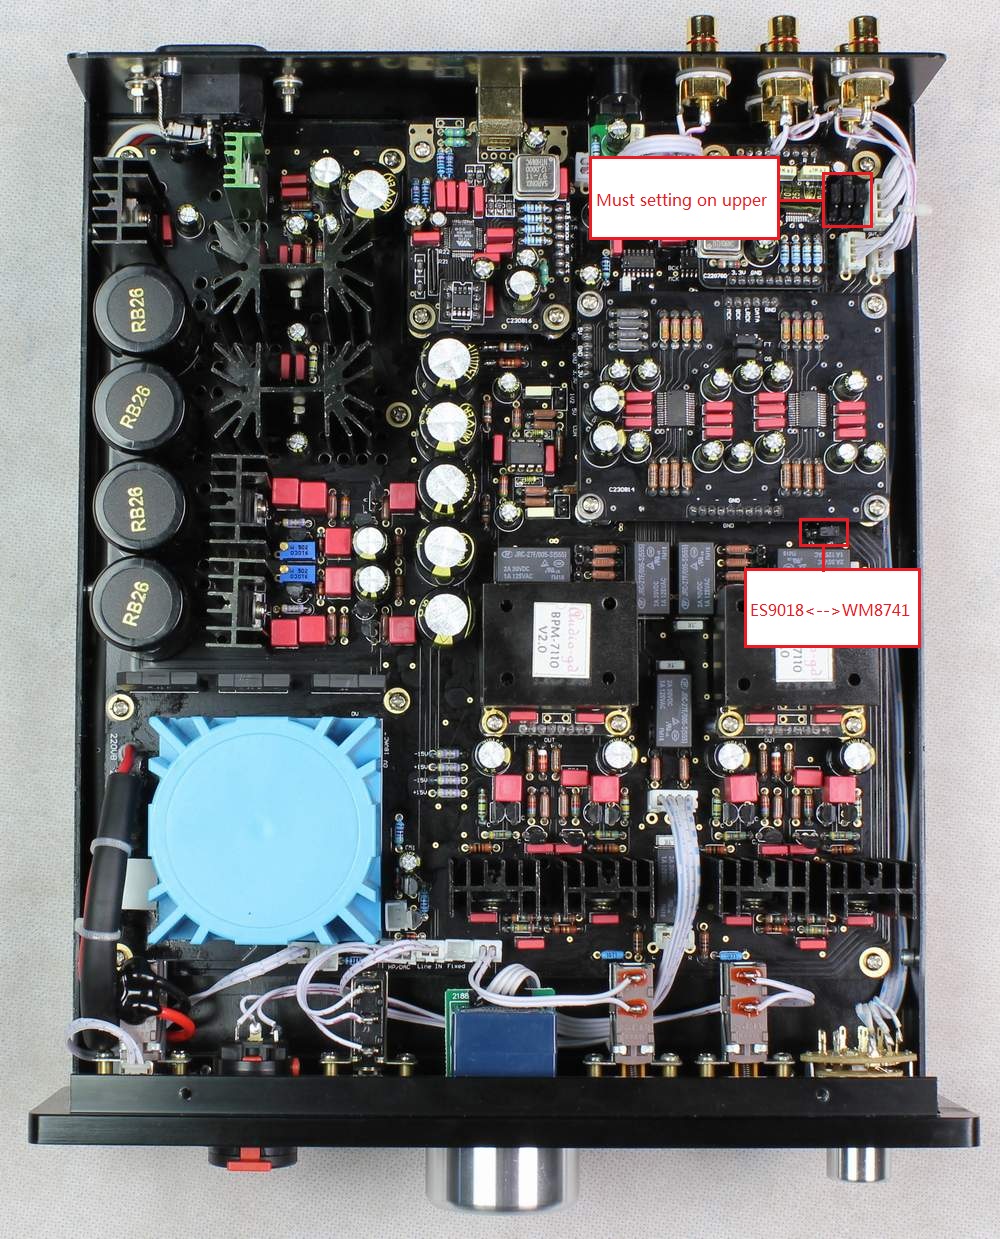
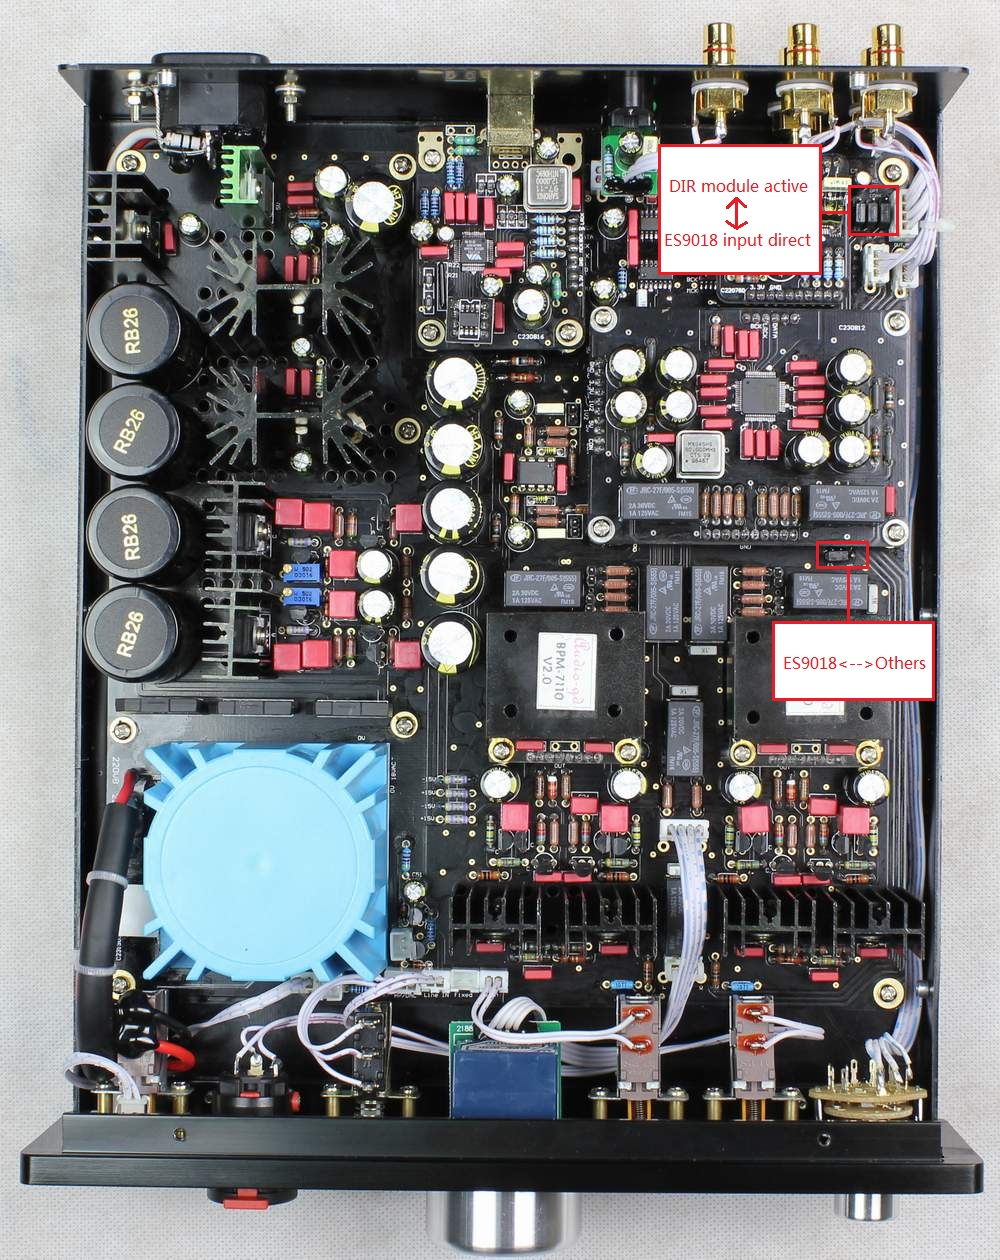
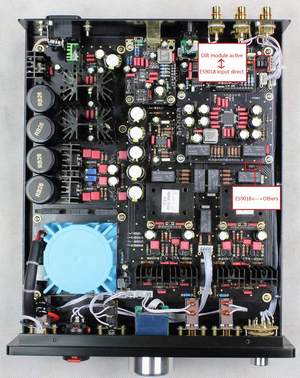
Setting the Compass 2 SPDIF input through DIR module or feed to
ES9018 direct :
The Compass 2 have built in DIR module (Users can choice either
DIR9001 and WM8805 install while place the order, in default install
WM8805 and SPDIF feed to
ES9018 direct ) .
Users can choice the SPDIF signal feed
to either ES9018 direct and through DIR module with 3 jumpers
setting , which is simply for users choice different sound flavors .
If match with low end PC sound card have large jitter cause
the sound interrupt
by feed to ES9018
direct, users can setting through DIR module for help . In default SPDIF feed to ES9018 direct
The setting guide:
1, Pull off the power cable at first .
2, Take off the top cover of the chassis.
3, Setting the jumpers .
4, Get back the top cover and push into the power cable tight
. |
 |
|
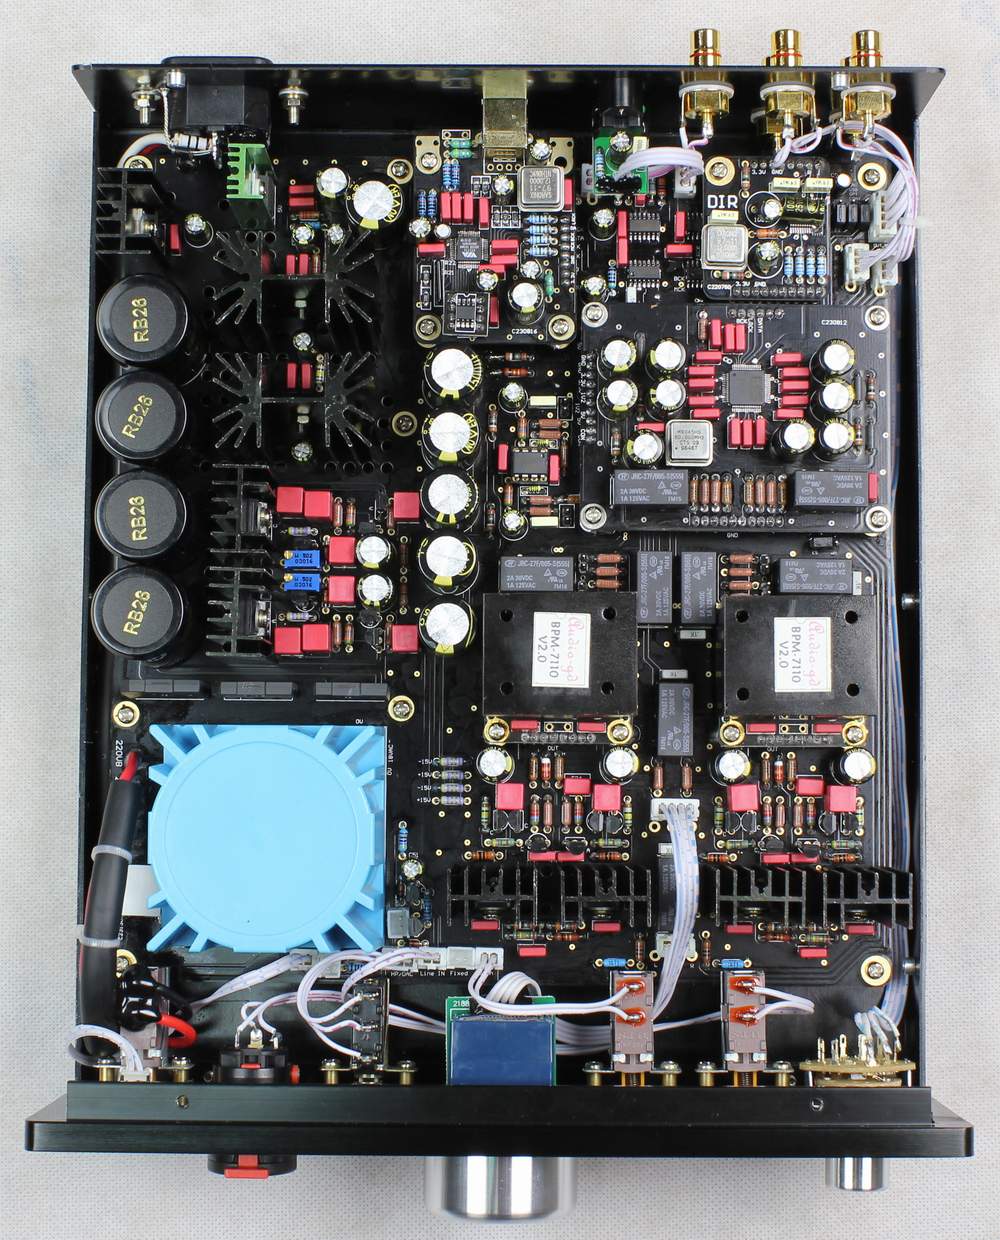
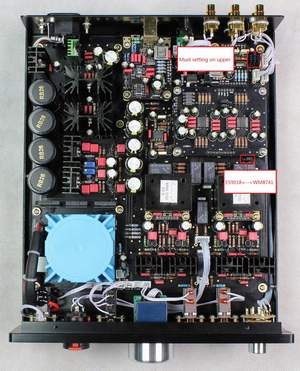
Replace the DA modules :
The Compass 2 can replace the DA modules between ES9018, dual WM8741
and PCM5102 for different sound flavors.
The setting guide:
1, Pull off the power cable at first .
2, Take off the top cover of the chassis.
3, Replace the DA module and setting the jumpers .
4, Get back the top cover and push into the power cable tight
.
Install the ES9018 module
Install the dual WM8741 or PCM5102 module
 |
|
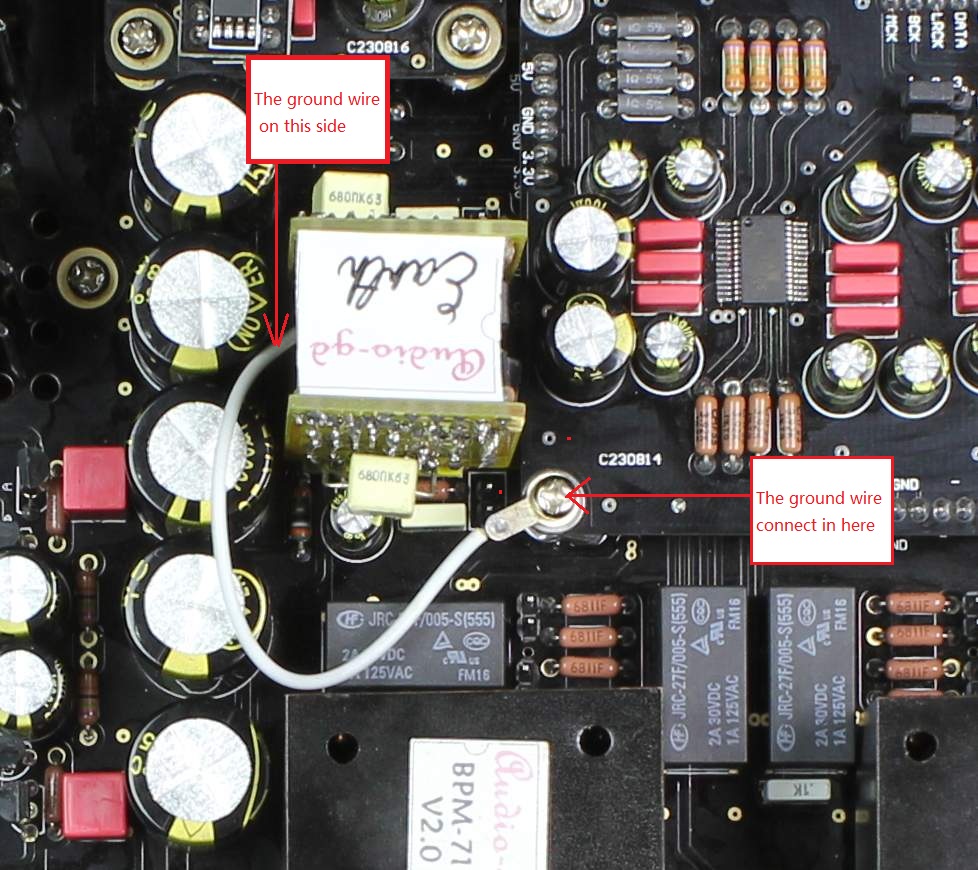
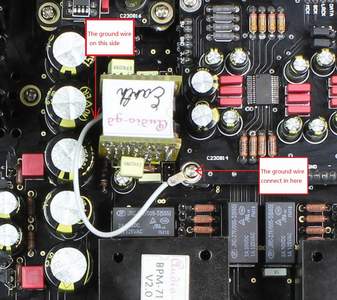
Exchange the OPA for different sound flavors:
1, Turn off the Compass 2 and
pull off the power cable .
2, Take off the top chassis.
3, Take off the original OPA chip
careful .
4, Push into the OPA proper, connect
the ground wire as the photo on right side.
( The OPA only effect the sound flavor of
line in . The built in DAC have not OPA in the signal channels . If
users want to change the sound flavors , can exchange the DA modules
. ) |
 |
|
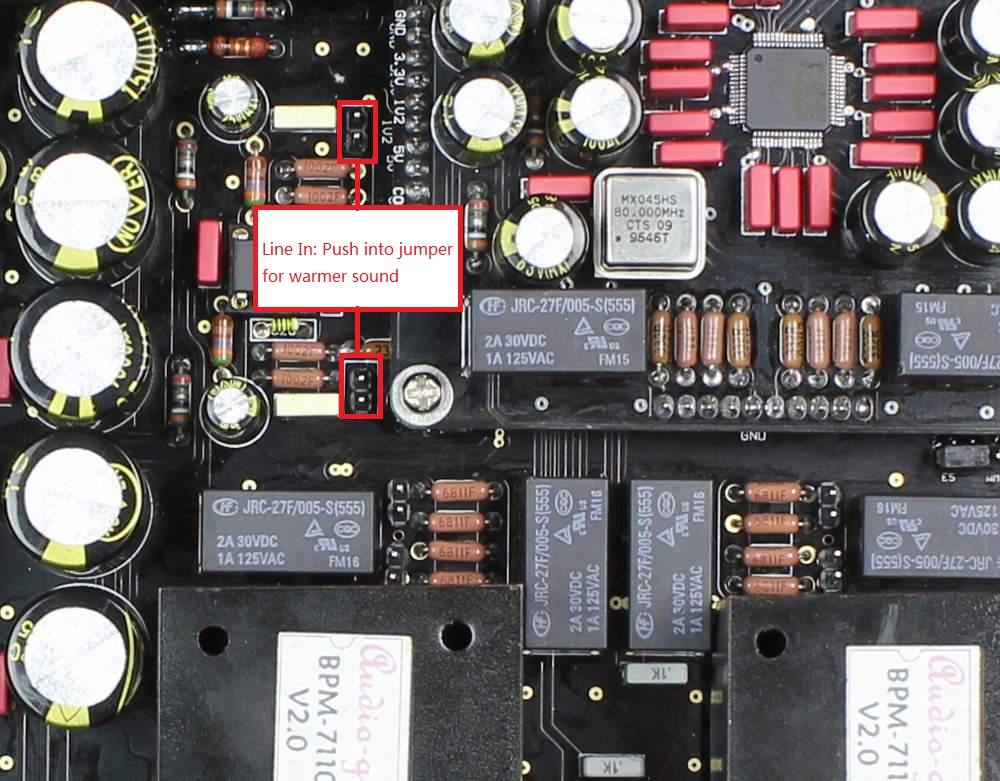
Setting warmer sound for Line in:
1, Turn off the Compass 2 and
pull off the power cable .
2, Take off the top chassis.
3, Push into two jumpers . |
 |
|
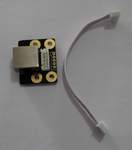
Setting the Compass 2 had I2S input:
1, Turn off the Compass 2 and
pull off the power cable .
2, Take off the top chassis.
3, Take off the 3 screws on the USB
module, pull off the USB module careful.
4, Push into the I2S kit to the
sockets. |
 |
|
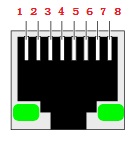 |
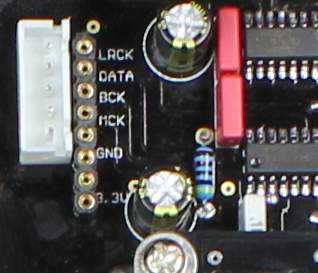
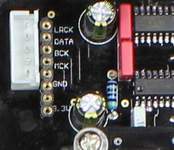
I2S define:
( 3.3V level , we can't
guarantee the I2S input can cooperate with all I2S output devices.
( The I2S transmit want to take care the transmit cable )
Pin 1 : SDATA
Pin 3 : LRCK
Pin 5 : SCLK
Pin 7 : MCLK
Pin 2,4,6,8 GND |
|
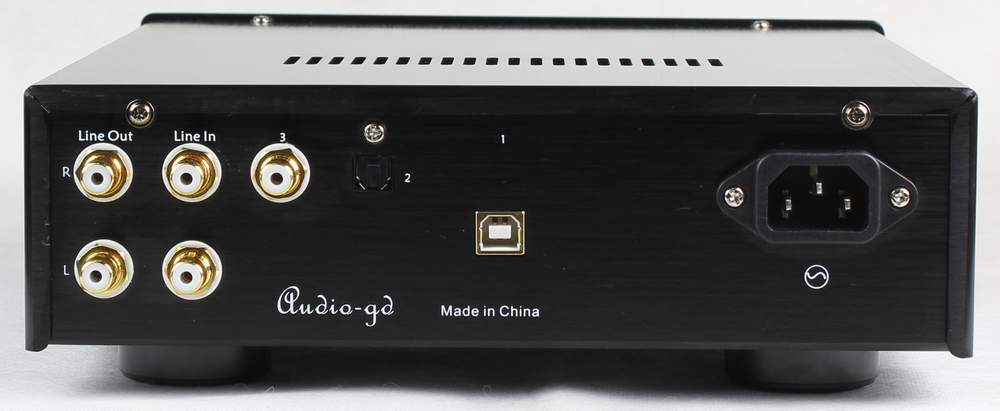
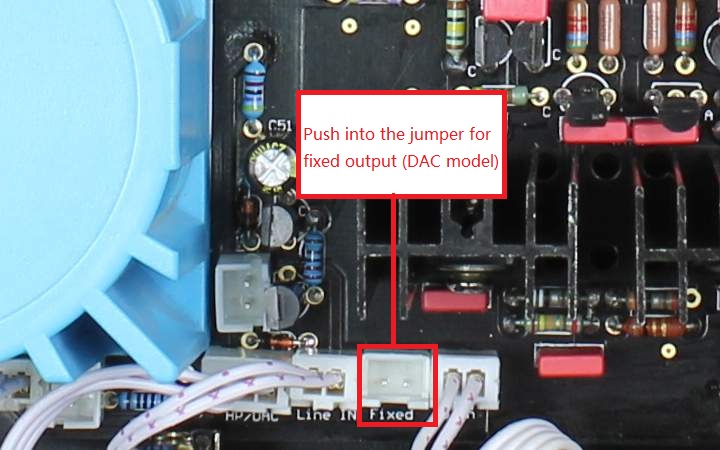
How to set the Compass 2 Line output
as variable or fixed level ?
The
Compass 2 has one group line output, In default
its output level setting is at variable model . If
users only want the fixed model , change the jumper as
below picture .
(Be care, if the Compass 2 line output connect to a non volume
control amp or active speaker , setting to variable output
model only . The headphone output always
have volume control. ) |
 |